

Clarion can generate the forms you need to add, change and delete data manually, but what do you do when you want to manipulate records using code? We have briefly looked at importing CSV data, but that isn't all we need to do. Introducing FileManager: look in the help file. It's under "ABC Library Reference" and it has numerous useful properties and methods.

Note: This article has been updated to leave out the .Init and .Kill methods, and to simplify the SET command. If you first read the article in 2022 then you should see the changes now. The .Init and .Kill methods are only useful in standalone handwrittten programs, and are handled automatically in a Wizard-generated program like the Learning Clarion application. Thanks to Carl Barnes at ClarionHub for pointing out my (newbie) mistakes.
Common Table Methods
- UseFile notifies other ABC objects that a file is getting ready to be used. Do this before you use Open.
- *Open tells the FileManager the calling procedure is using the file, then OPENs the file if it is not already open. The Open method handles any errors that occur while opening the file, including creating the file and rebuilding keys if necessary.
- ClearKey clears or (re)initializes the specified range of key component fields.
- SET initializes sequential processing of a FILE or VIEW.
- *Next gets the next record in sequence. The Next method handles any errors, except end of file, that occur while getting the record.
- *Fetch Gets a specific record by its key value and handles any errors.
- PrimeRecord prepares a record for adding to the managed table.
- *Insert adds a new record to the file, making sure the record is valid, and automatically incrementing key values as required.
- *Update changes (rewrites) the current record.
- DeleteRecord deletes a record from the table.
- Close tells the FileManager the calling procedure is done with the table, then closes the table if no other procedure is using it.

Exercise 1: Some Test Code
First, let's return to the "LCLesson" application. If you don't have one, you can download it and extract the files.


    0{PROP:StatusText,1} = 'My Test Code'
    ud.Debug('---- My Test Code runs here ----')
Now, when you run the application and choose the "Test Code" menu item, "My Test Code" will display in the application's status bar, and you will get a message in DebugView++. Something like this: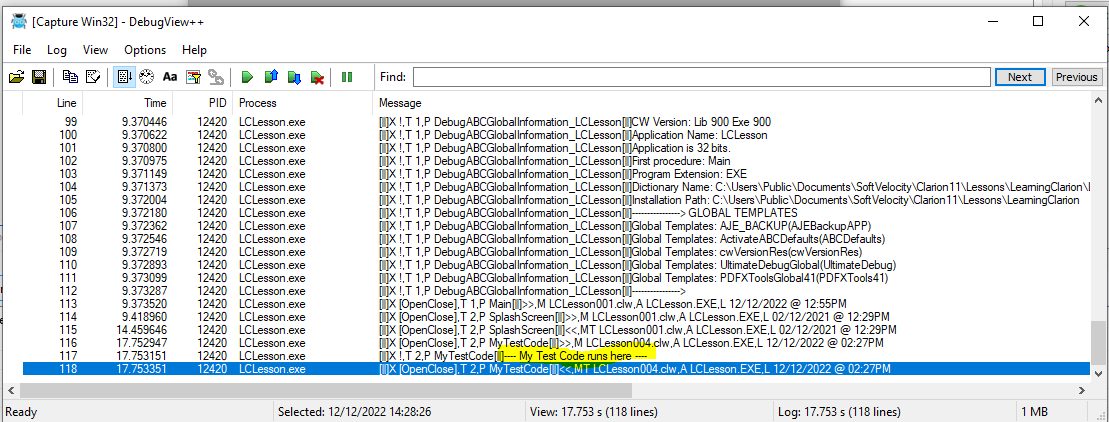
Exercise 2: Reading The Customer Table Records
Open LCLesson and use the Embeditor to edit "MyTestCode".
Copy and paste the following code to replace the original two lines of code:
    Access:Customer.UseFile()
    Access:Customer.Open()
    ud.Debug(' Access:Customer.Open()')
    i = 0  ! Record counter
    LOOP UNTIL Access:Customer.Next() <> Level:Benign ! CUS loop
        !// Process each customer record
        i += 1 ! Count the records
        ud.Debug(' Customer record ' & i)
        0{PROP:StatusText,1} = 'Customer record ' & i
    END ! CUS loop
    ud.Debug(' Loop ends. There are ' & i & ' records')
    0{PROP:StatusText,1} = 'There are ' & i & ' records'
    Access:Customer.Close()
    ud.Debug(' Access:Customer.Close()')
Once you have pasted the code, highlight it and press Ctrl-i to get the indenting to work properly. Warning! This code has no error checking. It is not production quality yet.


Exercise 3: Adding New Records
Before you continue, go to the LCLesson folder and make a copy of the Customer.tps file because we are going to add in some rubbish data to the current one. Then open the LCLesson application, and use the Embeditor to open MyTestCode.
    Access:Customer.UseFile()
    Access:Customer.Open()
    Access:Customer.ClearKey(CUS:KEYCUSTNUMBER) ! Go to the top of PK
    SET(CUS:KEYCUSTNUMBER) ! sets the processing order
    i = 0 ! Record counter
    LOOP UNTIL Access:Customer.Next() <> Level:Benign ! CUS loop
        !// Process each customer record
        i += 1 ! Count the records
        ud.Debug(' Customer: ' & CUS:CustNumber |
            & ' Company: ' & clip(CUS:Company))
        0{PROP:StatusText,1} = 'Customer record ' & i
    END ! CUS loop
    ud.Debug(' Loop ends. There are ' & i & ' records')
    !// List of US state codes, including Guam and Puerto Rico
    strStates = '..AK.AL.AR.AZ.CA.CO.CT.DE.FL.GA.GM.HI.IA.ID.IL.' |
       & 'IN.KS.KY.LA.MA.MD.ME.MI.MN.MO.MS.MT.NC.ND.NE.NH.NJ.NM.' |
       & 'NV.NY.OH.OK.OR.PA.PR.RI.SC.SD.TN.TX.UT.VA.VT.WA.WI.WV.WY.'
    !// Add in some more records
    LOOP i = 9 TO RANDOM(150,250) ! i
        CUS:CustNumber = i
        IF Access:Customer.Fetch(CUS:KEYCUSTNUMBER) = Level:Benign THEN ! Fetch
            ud.Debug(' Fetched Customer: ' & CUS:CustNumber |
                & ' Company: ' & clip(CUS:Company))
            0{PROP:StatusText,1} = 'Found customer ' & CUS:CustNumber
        ELSE ! Fetch
            !// Record not found, so add it in
            Access:Customer.PrimeRecord() ! Customer no is autonumber
            CUS:Company = 'Company ' & i
            CUS:FirstName = 'First ' & i
            CUS:LastName = 'Last ' & i
            n = RANDOM(1,52) ! Get a random state number
            CUS:State = SUB(strStates,n*3,2) ! State Code
            CUS:City = SUB(strStates,n*3,2) & ' City'
            CUS:ZIPcode = n * 1000 + i ! Made up "Zip" code
            Access:Customer.Insert()   ! Add in the customer record
            ud.Debug(' Added Customer: ' & CUS:CustNumber |
                & ' Company: ' & clip(CUS:Company))
            0{PROP:StatusText,1} = 'Added customer ' & CUS:CustNumber
        END ! Fetch
    END ! i
    0{PROP:StatusText,1} = 'Test code completed.'
    Access:Customer.Close()
Once you have pasted it, highlight it and press Ctrl-i to get the indenting correct. It should look like this:


Exercise 4: Performing Lookups
Now we are going to introduce a second table: State. Go back into the Embeditor and add in the State table, so you have "Customer" and "State" listed in "Other Files". Below the "strState = " assignment lines, add in the following code: !// State table lookups
Access:State.UseFile()
Access:State.Open()
Access:State.ClearKey(STA:KEYSTATE) ! Top of the primary key
SET(STA:KEYSTATE) ! sets the search order
!// Add in and update some more records
At the bottom of the code, remember to add the method to close the state table again:Access:State.Close()Now we need to add in the code to perform a lookup, based on the State code of each customer:
   IF Access:Customer.Fetch(CUS:KEYCUSTNUMBER) = Level:Benign THEN ! Fetch
       ud.Debug(' Fetched Customer: ' & CUS:CustNumber |
           & ' State ' & clip(CUS:State))
       STA:State = CUS:State ! This is the state code we want to fetch
       IF Access:State.Fetch(STA:KEYSTATE) = Level:Benign THEN ! STA
           CUS:Address = 'Here in ' & clip(STA:StateName)
       ELSE ! STA
           CUS:Address = 'Not Supplied'
       END ! STA
       Access:Customer.Update()   ! Update changes to the customer record
       ud.Debug(' Updated Customer: ' & CUS:CustNumber)
   ELSE ! Fetch
The total code should now look something like this:

Note: There is no reason why we can't do the same kind of lookup in the "Insert" part of the code, but we would need to assign the value of "CUS:State" (and also "STA:State") or the fetch will not work as intended. Remember: this code doesn't have any error checking yet!
Let's continue with Exercise 5 in the next post (below).
[ Introducing Clarion FileManager (Part 1) ]
[ Introducing Clarion FileManager (Part 2) ]
[ How to keep your useful CapeSoft accessories up to date ]
[ Adding Extensions to Clarion ]
[ Learning Clarion (Part 1) ]
[ Backing up your Clarion projects ]
[ Getting Started with Clarion (Part 1) ]
[ Introduction to Clarion 11 ]
[ Installing Clarion 11 on Windows 10 ]
[ Clarion Fixer (Part 1): Using the App ]
[ Clarion Fixer (Part 2): The Code ]
[ Change Mode vs View Mode ]
[ Clarion Build Events ]
[ Clarion Resources and Products ]
No comments:
Post a Comment