

From the Windows Start menu, go to the "Clarion 11 PE" menu folder, click on "Help Files" and click to open "Help"

In the help contents, go to the "Getting Started" page as shown here:

Read through the explanation, because all the concepts discussed there are really important. Then proceed to the next screen: "Getting Started Lessons". Read through it and at the end of the screen you will be instructed to run the Clarion IDE:


Clarion is a data-centric application development tool. Businesses rely on data. That means Clarion is optimized to create business programs.
Clarion’s data-centric approach begins with the data dictionary. You create a data dictionary using the Dictionary Editor and import your desired business data. You can then create a working application based on that data with the help of the Application Wizard.
Exercise 1: Create the Dictionary
It all starts with the dictionary. Navigate to the "Dictionaries" section of the "Start Page" and click on "New Dictionary".


Exercise 2: Import Your Data
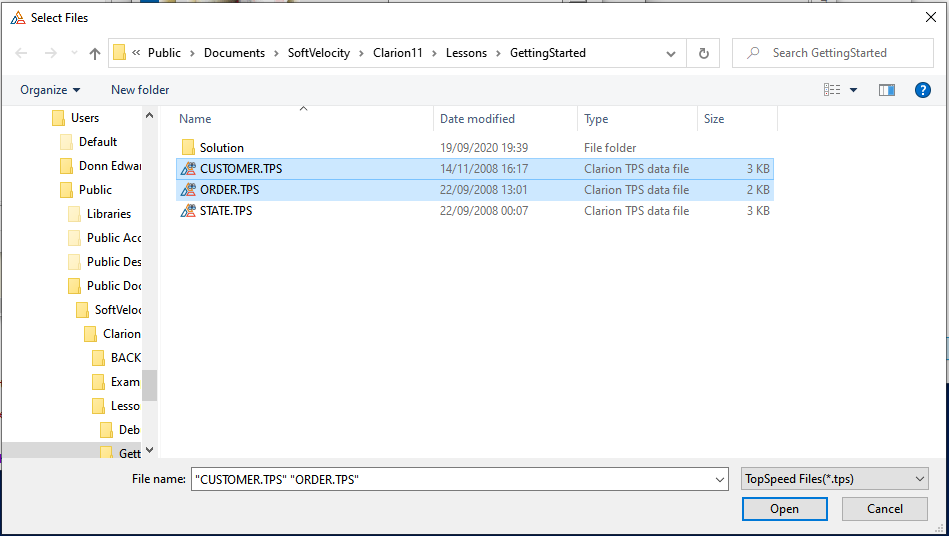
Now we will import some pre-defined tables: CUSTOMER.TPS and ORDERS.TPS. Clarion's native TopSpeed database driver keeps each table in a separate file (.TPS), unlike Microsoft Access and most SQL databases, which keep all the tables in a single file. It is also advisable to name every table as a singular item (Customer) not plural (Customers).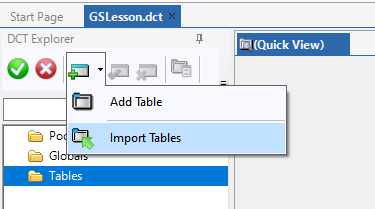
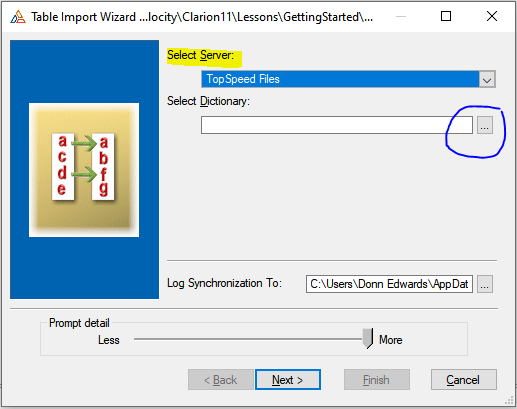
Next, click on the ellipsis (...) next to the "Select Dictionary" field to get the "Select Database" dialog box.

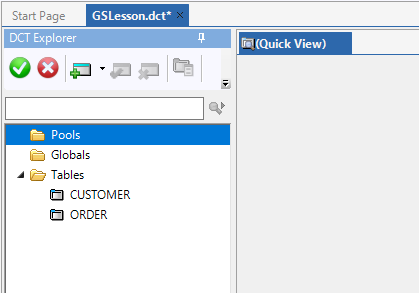
Once you have returned to the "Select Database" dialog box there are no other options or settings required. Those are reserved for other database drivers. Click "OK" so the Table Import Wizard can finish its work. It has imported the data definitions of the two files we selected.
To review, the dictionary will be used with the application generator to help match and locate the data that we are planning to process.
Your dictionary is auto-saved after the import, so let’s proceed to exercise 3.
Exercise 3: Relate Your Tables
Obviously, we want the "Order" table to contain the pertinent information of the "Customer". This means there must be a relationship between the two tables. In this case, one Customer can have many Orders, making this a "One to Many" relationship. To define this relationship, we must link the tables together in the data dictionary to provide the Application Generator with the information necessary to access the related records.
Scroll down to find the "Relations" section.

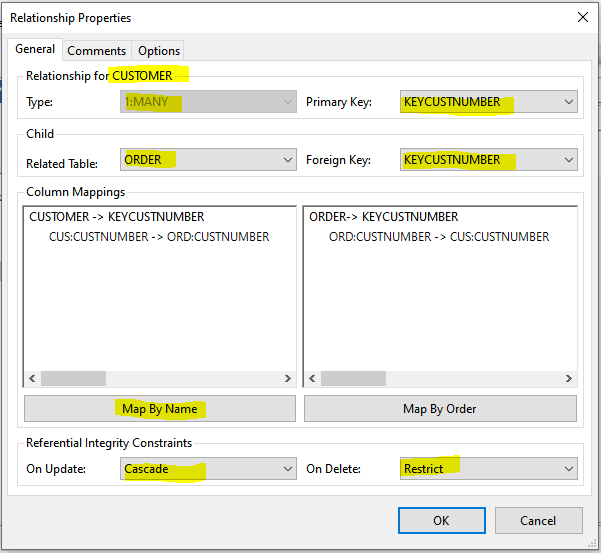
In the Referential Integrity Constraints group box, choose "Cascade" from the "On Update" dropdown list. Choose "Restrict" from the "On Delete" dropdown list. The generated source code will automatically maintain referential integrity between the tables. Now that everything is set up, click "OK" to create the relationship.
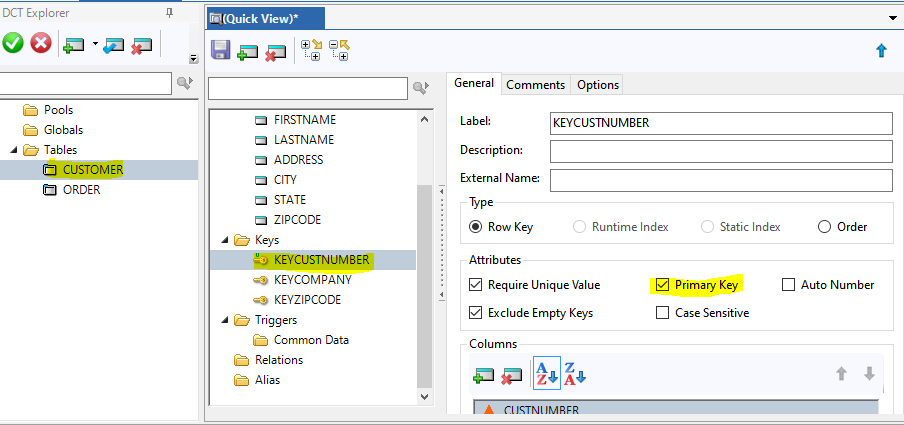
Exercise 4: Add a Lookup Table
Clarion documentation often confuses tables and files, because with TopSpeed they are much the same. We will now look at "fine tuning" the dictionary in the Dictionary Editor. This will directly affect how our application will be generated in the final exercise.


This creates a column named "State". This column is the link to the "State" column in the "Customer" table. Using the same column names makes it easier to link the two tables in a relationship. In the generated Clarion code, adding the table’s prefix to column labels (separated by a colon) creates unique names for columns with the same name in separate tables. Therefore, this column will actually be called "STA:State", while the column in the Customer table is called "CUS:State".

Since we only want two columns in this table, click "Cancel" when the third (empty) dialog box appears.


Now click "OK" to save the completed key, followed by "Cancel" to close the empty key dialog.

Continue the exercises in "Getting Started with Clarion (Part 2)".
1 comment:
Excellent article! Keep it up. We can both learn Clarion 11 together.
Post a Comment