This post follows on from
Getting Started with Clarion (Part 1).
Exercise 5: Create the Lookup Relationship
The "Customer" table is going to use the "State" table as a foreign key lookup. So click on the "Customer" table, and then click on the "Relations" folder, so we can add a new Relationship.
Click on the "Add" button shown, and the "Relationship Properties" window will open up.
Change the "Relationship type" to "MANY:1" since we are only selecting one State for a given Customer, but many Customers could be in the same State. No index is required for the Foreign Key, so set it to "None". For the "Related Table" select "State" from the drop-down list, and choose its Primary Key, "KEYSTATE". Then click on "Map By Name" since both fields have the same name. Then click "OK". When the "Relationship Properties" window returns for the second relationship definition, click "Cancel" since we are only defining a single relationship this time.
Exercise 6: Set the Lookup Validity Check
When entering a new Customer, we can specify that the State column must match an existing record in the State table. So click on the "Customer" table, and then the "State" field.
Find the "Validity Checks" tab and then select "Must be in Table" to ensure that all "State" entries in "Customer" records match records in the "State" table. Click on the "Save" icon when done. We had to define the relationship with the "State" table first, before this option became available.
Exercise 7: Fine-Tuning the Customer and Order Tables
The more time spent fine-tuning your dictionary, the more time you will save generating a near perfect application using the various wizard tools. When we imported the structure of these two tables, some of the default properties were not ideal for the application we are creating. So we need to fine tune them for better results.
We want the Customer primary key to be autonumbered, so click on the "Customer" table, go to "Keys" and select "KeyCustNumber". Check the "Autonumber" box, and then the "Save" button. This will cause any new Customer records added to be automatically numbered.
Similarly, click on the "Order" table, select the "KeyOrderNumber" key, and modify its properties by checking the "Autonumber" box. Now all new "Order" records will automatically get the next order number. Click "Save".
We also want to make sure the autonumber-generated values of new "Customer Number" and "Order Number" fields can't be edited. We do this by changing them from the default "Entry" mode.
Click on the "Customer" table, and the "CustNumber" field. Find the right-hand "Controls" tab and change the "Control Type" from "Entry" to "String". Click "Save".
Repeat this process for the "OrderNumber" field in the "Order" table. By choosing the properties for a control at this time, you can save time later. Every application you generate from the dictionary, and every procedure in the application, will automatically format the control the way you want it. If you don't format it here, and if the control requires custom formatting, you will have to custom format it for each procedure and application later.
 Clarion
 stores dates as a long integer. "Clarion Standard Date" is the number of days since December 28, 1800. This isn't meaningful to most users, so let's change it to a more useful display.
Select the "OrderDate" field in the "Order" table. Go to the "General" tab and change the "Screen Picture" setting to "@D17B". No, you don't need to remember these settings. Just to the right is an ellipsis button ("...") and when you click on it, you will see the "Edit Picture" dialog. All the available display options are available from a series of drop-down lists.The most common date format in the USA is @D2 but for the rest of the world it is probably @D6. @D17 uses whatever
Windows has as its Short Date format. The
Clarion help topic is called "Pattern Pictures" and "Date Pictures". (Note:
NetTalk recommends against using @D17 and @D18 for web apps)
Click "OK" when done. And remember to save your changes.
Another problem is with the Zip codes, which are stored as long integers, but this causes 90210 to display as 90,210, and 06792 becomes 6,792. We will use the pattern picture "@P#####P", which causes the number to be displayed with 5 digits because there are 5 hashes in the pattern.
Now it's time to save all our work and close the DCT Explorer. Click on the "Save and Close" button shown here:
Exercise 8: Generate your Program using the Wizard
Now it is time to unleash a powerful part of
Clarion and the IDE:
The Application Wizard. In this exercise, we will use the dictionary that we created in Exercises 1 – 7, and generate a full-featured application, all in just a few minutes with no hand coding needed.
Only the "Start Page" should be open at this point. Click on the "Solutions (Projects and Applications) tab, and then on "New Solution". This should open the "New Solution, Project or Application" dialog box.
Choose "Application", then type in "GSLesson" for the application Name, and change the location to "C:\Users\Public\Documents\SoftVelocity\Clarion11\Lessons\GettingStarted" using the ellipsis button next to "Location". Unselect the "Auto create project subdir" option and click "Create".
In a few moments the "Application Properties" dialog appears. We need to select the dictionary file. Click on the ellipsis button, and you should see the dictionary file "GSLesson.dct" in the folder. Click "Open" to select it. Next, make sure the "Application Wizard" checkbox is selected, and click "OK" to begin the Wizard.
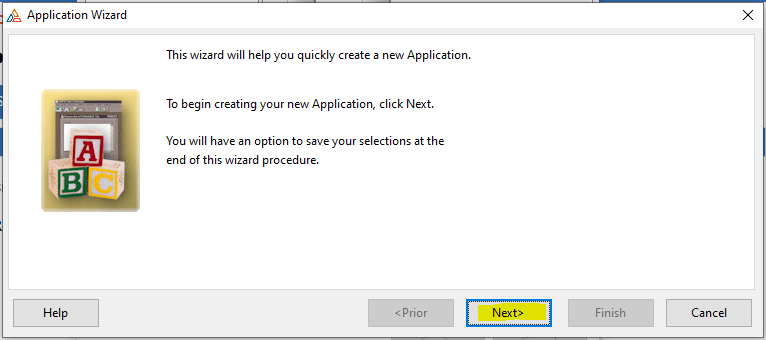
Click "Next" after reading the introductory remarks.
Accept the default theme and the suggested report layout and click "Next".
Accept the default option to generate procedures for all files (tables) in the dictionary. Click "Finish" instead of "Next". We will return to explore other options in the Wizard in the next exercise.
Once the Application Wizard has created "GSLesson.app", click on the "Generate, Make and Run currently selected application" button. This will turn the application file into an executable file, and run the application.
Spend a bit of time exploring the application. At this stage, it is "unpolished" (to put it mildly). A bit more time spent in the dictionary will make the application a lot more professional.
Note how the look and feel is compatible with even the oldest versions of
Windows. Explore some more. Try viewing and running reports on the default data that is supplied. In the running application, we don’t need to add or modify and data at this time, but just want to see the part of the application that our changes affected.
In the Customer’s update form, entering an invalid state that does not exist in the State file will cause a pick list to pop up when the user moves away from the field.
Once you have explored the application further, exit the application and then click on the "Save and Exit" button for the application.
Exercise 9: Improve the Dictionary
The official "Getting Started" lesson ends at this point, but the dictionary still needs some improvements to make the application vaguely presentable to the user. So we are going to throw away the application we just generated, fix up the dictionary, and generate a better one.
When we closed the application, we were left with a blank IDE. Click on the "View" menu and select "Show Start Page" to get the Start Page back. There is also a toolbar button to do this. See if you can find it.
Click on the "Dictionaries" tab and then on the "GSLesson" dictionary to open it.
Click on the "Customer" table, then on "Properties for (Customer)" and then modify the "Label" from
all caps to
mixed case, and fill in the Description as "Customers" (Plural). This makes everything more legible and professional. Click "Save". If you forget, when you move to another object, the
Clarion IDE will prompt you to save.
Click "Yes" if you get this dialog box.
Click on the first field, "CustNumber" and add in a description, and change the "Prompt Text and Column Heading to Mixed case and something more legible, as shown above.
Now we are going to do the same thing with the other fields, as shown below:
Why all the fuss about mixed case? If your labels are
ALL CAPS then the user may be encouraged to type in the data in
ALL CAPS too, which is horrible.
Click on the "
Save All" button when you are done. You don't want to lose all your work.
Add in descriptions for all the keys. Click "
Save".
Now do the same thing for the "Order" table:
Some tweaks for the "State" table:
Click on the "
Save and Close" button.
Exercise 10: Re-generate your Program using the Wizard
Before we change some defaults in the Application Wizard, we need to make a backup. Open the folder "C:\Clarion11\template\win\TFT" and make a ZIP archive of the four TFT files there:
These files get changed later, so it is best to have a copy of the original version in case you need them later.
From the "Start Page", click on the "Solutions" tab and the "New Solution" button. We are going to create an updated version of the application, based on the updated dictionary.
Once the "Application Wizard" opens, click "Next".
Change the Theme to "XPStyle" instead of "Default". We are going to use it to make a more modern looking application. Click "Next", and "Next" again.
Change the Control Model to "Both" and click "Next".
The "Customization" buttons can save you a lot of work later, so let's explore each one in more detail. Click on "Frame Customization".
The default font for
Windows 10 (it started in
Vista) is "Segoe UI", so click on the "Font" button and change it to
Segoe UI,
Regular,
10pt. You can adjust the size later if you feel the need to make it larger, but you may need to adjust button sizes as well if you do. There is a code generation bug that ignores this setting, but we will fix that manually.
Change to the "Frame Menu" tab, and take a quick look through the sub-tabs: "File", "Edit", "Window" and "Help". Remove the check box from "Enable Help Menu". We don't have an application help file yet, so for now we will switch off the help menu since it doesn't work anyway.
Click "OK" to return to the Wizard, and then click on the "Form Customization" button. Click on the "Font" button and change it to
Segoe UI,
Regular,
10pt.
Click on the "Buttons" tab and switch off the "Enable Help Button" setting. Click "OK".
Click on the "Browse Customization" button. Click on the "Font" button and change it to
Segoe UI,
Regular,
10pt. Change the word "file" in the "Browse Message" field to "table". Similarly with the "Caption" field.
Click on the "Buttons" tab and switch off the "Enable Help Button" setting. Click "OK".
Click on "Report Customization" and go to the "Progress Window" tab. Click on the "Font" button and change it to
Segoe UI,
Regular,
10pt. This is the font that displays the progress window, it doesn't set the font of the report itself. That comes next.
Click on the "Report Layout" tab. Set the "Paper Type" to the default size for your country. For mine it is A4. Click on "Font" and choose "Calibri", "Regular", "10pt". Click on the "
Header" tab.
Change the word "file" to "table" in the "Report Title". Set the "Title Font" to "Calibri", "Bold", "12pt", and the rest of the header font to "Calibri", "Regular", "8pt".
Now click on the "
Detail" tab and set the font to "Calibri", "Regular", "10pt".
Click on the "
Footer" tab and change the font to "Calibri", "Regular", "8pt".
Finally, click on the "
Form" tab and set the font to "Calibri", "Regular", "10pt". Click "OK".
We have returned to the "Application Wizard", so click on "Next" and "Next".
Enable the "Overwrite existing procedures" option because we are replacing stuff that we did before. Click "Next".
On the last screen, enable the "Save settings to a new Theme" option, and create a theme called "Win10". Click "Finish".
The Application Wizard will generate an entirely new application, based on the improved dictionary and modified theme. If you are asked about overwriting existing files, answer "Yes".
Exercise 11: A few more tweaks
The Application Wizard has generated the new version of the application. The tweaks we are about to make are technically "modifying code" and we haven't covered that yet, but these modifications are fairly straightforward and we will cover writing code in subsequent lessons.
In the "Application Tree", make sure the "Tree Mode" is set to "Procedure". Click on the first line, the "Main (Frame)" procedure. We are going to tweak a few properties of the Main window. Under "Views" click on "Properties".
When the "Main - Procedure Properties" window opens, click on the ellipsis button to the right of the "Window" button. We are going to make a few small changes to the code for the Main window.
On the first line, change the word 'Application' to 'Getting Started' as shown. This is the title of the application.
On the third line, that begins with "MENUBAR", add in the following at the end of the line: ",FONT('Segoe UI',10)" to ensure the menu uses the correct font.
On line 6, add in the following: ",ICON(ICON:Print)".
On the 11th line, go to the end of the line and add ",ICON(ICON:Cut)".
On the 12th line, add ",ICON(ICON:Copy)".
On the 13th line, add ",ICON(ICON:Paste)".
Scroll down to the bottom of the procedure and find the two lines that define the "Help" button. Hightlight them as shown, and then use the "Comment Region" button to comment out the button. It will put an exclamation point at the start of each line, and the commented lines turn green. Now click on the green "Save and Close" icon, and again on the next "Save and Close" button. Then click on the "Save" button, as shown:
Let's see how those changes improved things. Click on the "Start without Debugger (Builds Solution)" button and wait for the application to launch.
Notice how the application title is now "Getting Started" instead of "Application". The "File" and "Edit" menus have cons in some of their entries, and we have a toolbar below the menu items. The menu is the correct size and font, too.
The "Browse" menu no longer has those ugly
ALL CAPS entries either.
Click on "Browse Customers" and notice how this theme shows the sort order as a drop-down list with names that make sense to the user, instead of "KEYCUSTNUMBER". And the toolbar buttons work. Explore some more to see how the other changes have propagated from the dictionary to the application.
One final note: The changes made in this exercise (11) will not be saved if we use the Application Wizard again. So it is best to focus on the data and the data structure in the dictionary until you are absolutly sure it is correct before you fix up the appearance and add the business rules and stuff.
Summary
Let’s recap what you accomplished:
- You used the Dictionary Editor to create a data dictionary.
- In your new dictionary, you defined a Customer and Order table using the dictionary Editor’s Table Import feature.
- You set up table relationships between the tables that you imported.
- You used the Data Dictionary to quickly add another table definition.
- You defined the relationship between the two tables and specified the Referential Integrity rules governing the relationship.
- You used the Application Wizard to create your first application, with added validation to the Customer’s State column.
In less than an hour, without any "coding" on your part, you’ve created complete application for a database containing three related tables. Pretty cool.
In this first lesson, you should notice the overall design flow: dictionary changes, application changes, back to the dictionary, back to the application, and so on. You will find that the more time that you spend on your dictionary design at the start, the less modifications you will need on the application side. We have only scratched the surface into the power of the
Clarion development environment.
Continue the exercises in "
Learning Clarion (Part 1)".


1 comment:
This little tutorial has really helped my understanding of how clarion works, thank you so much to the creator. I need to learn clarion and there isn't allot of resources for it ,this was a saviour.
Post a Comment