This follows on from
Learning Clarion (Part 5). In the lesson below, we’ll create the procedures that will maintain the "Order" and "Detail" data tables.
Lesson 11: Advanced Topics
For the "Order Update" form, we’ll place the columns from the "Order" table on an update form, perform an automatic lookup to the "Customer" table, add a BrowseBox Control template to show and edit the related "Detail" items, calculate each line item detail, then calculate the order total.
Set Up the UpdateOrder Form
Highlight the "UpdateOrder" procedure in the Application Tree dialog, then click on the "Properties" button. In the "Defaults" tab, choose "FORM(Add/Change/Delete)", then press the "Select" button.
Type in a suitable description ("Order Form"), and then click on the ellipsis next to the Window button.
Set the WINDOW caption to 'Order Form' and add ",FONT('Segoe UI')" to the end of line 1. Click the green "Save and Close" button, and then click on the "Window" button to open the Window Designer.
Go to the "Data / Tables" pad, and double-click on the "<ToDo>" entry, highlight the "Order" table and click on "Select".
Drag and drop the "OrderDate" and "OrderNote" fields from the "Data / Tables" pad to the top of the form, as shown.
Change over to the "Toolbox" pad, select the "ENTRY" control and drag it to a spot below the "OrderDate" input field. Then go to the "Properties" pad on the right, click on the ellipsis to the right of the "Use" property, and choose "CustNumber" from the "Order" table.
Return to the toolbox, and drag a "PROMPT" control to the left of the "CustNumber" entry control, as shown. Click on the "Edit Value" smart tag. If you miss it, you can find "Edit Value" in the right-click popup menu. Change the value to "&Cust Number:" and click "Accept".
In the "Properties" pad, change the "Use" property to "?CustomerPrompt".
Add a lookup procedure call into the Customer list
The standard actions for any entry control allow you to perform data entry validation against a row in another table, either when the control is Selected (just before the user can enter data) or when the control is Accepted (right after the user has entered data).
Right-click on the "CustNumber" entry control and select "Actions..." from the menu.
Click on the ellipsis to the right of the "
Lookup Key" for "When the Control is Selected". Click on the "Order" table and then the "Add" button to highlight the related "Customer" table and "Select" it.
Click on the "Customer" table, choose the "KeyCustNumber" key and click "Select". Now we have the Lookup Key.
Now we move to the "
Lookup Field", click on the ellipsis on the right, and choose the related "CUS:CustNumber" field from the "Customer" table. Click "Select". Now we have the Lookup Field.
Next, we need the "
Lookup Procedure". From the drop-down list choose "BrowseCustomers". Make sure the checkbox for "Force Window Refresh when Accepted" is checked. Click "OK".
Once again, right-click on the "CustNumber" control and choose "Embeds..." from the popup menu. This displays a list of just the embed points associated with this one control. This is the quickest way to get to a specific control’s embed points, and it’s the second way you’ve seen so far to get to an embed point. There is a third method that’s still to come.
Click on the "Selected" event and press the "Insert" button. Highlight "Source" and click "Select". This opens the Embeditor.
Start typing "?" and the floating "Populate Column" toolbox appears. This is to assist with speed and accuracy, so you don't introduce errors from typing mistakes. We need to type "?ORD:CustNumber{PROP:Touched} = TRUE".
It is "standard Windows behaviour" that, if the user does not enter data into a control and just presses tab (or CLICKs the mouse) to go on to another control, an Accepted event does not happen. This allows users to easily tab through the window’s controls without triggering data-entry validation code on each control. However, sometimes you need to override this "Windows standard behaviour" to ensure the integrity of your database. The
?ORD:CustNumber{PROP:Touched} = TRUE
statement uses the
Clarion language Property Assignment syntax. By setting "PROP:Touched" to TRUE in the Selected event for this control, an Accepted event is always generated, whether the user has entered data or not. This forces the lookup code generated for you into the Accepted event for this control (from the information you entered on the Actions tab on the previous page) to execute. This ensures that the user either enters
a valid Customer number, or the Customer list pops up to allow the user to
select a Customer for the Order. Click the green "Save and Close" button when done.
Notice how the SOURCE entry has been added in. Click on the green "Save and Exit" button to return to the Window Designer.
Drag a "STRING" control from the Toolbox and place it to the right of the "CustNumber" control. We are going to use this to display the Customer name as a read-only field.
In the "Properties" pad, click on the ellipsis to the right of the "Use" property and select the "Company" field from the "Customer" table. Then change the "IsPicture" property to "True" and set the "Picture" value to "@s30". Spend a few minutes adjusting the fields and aligning them, so they are neat and tidy.
Placing the Detail Table's Control Templates
The next key element in this window is a browse list box control, synchronized to the Order Number of this form. This will show all the rows in the "Detail" table related to the currently displayed "Order" table row.
Switch to the "Control Templates" pad and drag a "BrowseBox" template just below the "CustNumber" controls. When the "Select Column" dialog box opens, double-click on the "<ToDo>" entry and choose "Detail". Click on "Select".
Now select the "Detail" table and click on the "Change" button to choose the "KeyOrderNumber" key. Click "Select". Finally, click on the "ProdNumber" field and click "Select".
Adjust the shape of the list box and then right click to choose "List Box format ..."
Change the Header "Indent" property to "2" and the "DataJustification" setting to "Center".
Use the "Add Field" button to select the "Quantity" field, and check that its "DataJustification" property is "Center".
Use the "Add Field" button to select the "ProdAmount" field, and check that its "DataJustification" property is "Center".
We want to create a new variable to display the total price for each line item (the quantity multiplied by the unit price). Click on the "Insert Field" button, click on the "Local Data UpdateOrder" item, and click "New".
The column name is "ItemTotal". Give it a suitable description. Change the Data Type to "DECIMAL", with 7 characters and 2 places. Click "OK". Check that its "DataJustification" property is "Center".
Click on the "Add Field" button, select the "Detail" table, click "Add", choose "Product" and click "Select". This adds the Products table to the Control template’s table schematic as a lookup table. The related row from the Products table is automatically retrieved for you so you can display the product description in the list.
Choose the "Product" table, highlight the "ProdDesc" field, and click "Select".
Adjust the field widths, change the Header "Justification" settings to "Left", and the Header "Indent" settings to "1", except for the first field, where it should be "2". Adjust the Header Text as shown.
We want this list to only display the "Detail" table rows that are related to the "Order" table row currently being edited. Therefore, we need to specify a Range Limit. Right-click on the list box and select "Actions..." from the popup menu.
In the "Range Limit Field" use the ellipsis to specify the Detail table's "OrderNumber". Change the "Range Limit Type" to "File Relationship" and the "Related file" to "Order". Don't click "OK" yet because we haven't finished here yet.
Add an Order Invoice Total calculation
Now we want to calculate the order total and save it in the Orders table.
Go to the "Totaling" tab and click on the "Insert" button. The "Total Target Field" is "InvoiceAmount" in the Order table. Use the dropdown list to set the "Total Type" to "Sum" and then click on the "E" button to open the expression builder.
Double-click on the "ItemTotal" field to add it to the "Expression" list at the bottom. This is the column whose contents will be used in the total calculation. So far, we’ve only declared this column and not done anything to put any value into it, but we’ll get to that soon. Click on the green "Save and Exit" button. Then click "OK".
Go to the "Classes" tab because we want to give the object a more useful name. Change it to read "BrowseDET" and click "OK".
With the list box still selected, go to the "Properties" pad and set the "Horizontal" and "Vertical" scroll bar values to "True". Click on the "Save and Close" button, and the "Accept changes" button to
save your work. Then click on the "Window" button to return to the window designer.
Add the standard table update buttons
Click on the list box, and then find the "BrowseUpdateButtons" control template and drag it to the bottom left of the list box.
Select just the "Delete" button, right-click and choose "Actions..." from the popup menu.
Check the "Use Edit in Place" box. Checking this box for one button in the Control template checks it for all three. We will be using the Edit in Place technique to update the "Detail" table rows instead of an update Form procedure. This will allow us to demonstrate some fairly advanced programming techniques and show just how easy they are to perform within the Application Generator. Click "OK".
Add a "display-only" Control for the Invoice Total
From the "Toolbox" pad, drag the "STRING" control to the bottom-right corner of the list box. Change the "IsPicture" property to "True". Click on the ellipsis to the right of the "Use" property to select the "InvoiceAmount" field from the "Order" table. This specifies the control will display data from a variable, not just a string constant. Change the "Picture" property to "@n$10.2". Click on the green "Save and Close" button to close the Window Designer and
save your work.
Making it all Work
There are a couple of things we need to do to make this procedure fully functional: add a
Formula, and configure the
Edit in Place.
To make the "ItemTotal" calculate the correct amount for each "Detail" row in the browse list box, we need to add a Formula to the procedure. This will also allow the browse totalling to correctly place the invoice total in the "ORD:InvoiceAmount" column. Click on the "Formulas" button to open the Formulas tab.
Choose the "Format Browse" template class, and click on "Insert".
The
Formula Editor design dialog appears. Type "Item Total Formula" in the "Name" field. Select "Format Browse" for the "Class" Field if it isn't already selected. Click on the ellipsis to the right of the "Result" field. Choose "Local Data UpdateOrder" and then "ItemTotal". This names the column that will receive the
result of the calculation. This is the column we defined earlier through the List Box Formatter. Click "Select".
Click on the "Data" button on the right under "Operands". Choose the "Detail" table and the "Quantity" field. Click "Select".
This places "DET:Quantity" into the "Statement" field for you. It contains the expression being built. You can type directly into the "Statement" field to build the expression, if you wish. Click the "*" button in the Operators group. This is the multiplication operator. Notice how it has added the "*" to the Statement field. Click on the "Data" button again, and select the "ProdAmount" from the "Detail" table. Click the "Select" button.
Use the "Check" button to check the syntax of the Statement line. A green checkmark appears left of the button, indicating the syntax is correct. If a red X appears, the expression’s syntax is incorrect and the highlighted portion of the statement is what you must change. Click on the green "OK" button.
Configuring Edit in Place
Now we need to configure the
Edit in Place characteristics. We previously used Edit in Place for the "Phone" table and simply took all the default behaviours because that was a fairly simple table. However, now we’re editing a line item "Detail" row for an order entry system, which means we need to do some data entry validation beyond simply ensuring the user types in a number that fits the display picture. To do this, we’ll need to
extend the simple Edit in Place functionality provided by the Application Builder Class (ABC) Library.
Change to the "Extensions" tab, select "Update a Record from Browse Box on Detail" and click on the "Properties" button.
Click on the "Configure Edit in place" button. Double-click on the "DET:Quantity" field, and change to the "Class" tab. The ABC Library’s EditEntryClass defaults to using an ENTRY control, and for this column we want to use a SPIN control, so the user can just spin to the quantity they want to order. Therefore, we need to override some methods for this column too, to have a SPIN instead of an ENTRY control. Clear the "Use Default ABC" check box. Change the "Base Class" to "EditSpinClass". Click "OK".
Double-click on "DET:ProdAmount" and clear the "Allow Edit-In-Place" check box. For this procedure we do NOT want the user to be able to edit the "DTL:ProdAmount" column because we’re going to get its value directly from the "Product" table, and we don’t want the user to be able to change it. That’s why we turned off the "Allow Edit-in-Place" box. Click "OK".
Repeat these steps for the "ItemTotal" and "PRO:ProdDesc" fields. Their "Edit-In-Place" facility should be disabled, as shown. Click "OK", "OK", "Save and Exit", and "Accept changes" to
save your work.
Using the Embeditor
Highlight the "UpdateOrder" procedure and click on the "Embeditor" button on the right.
This opens the
Embeditor: the third method of accessing embed points in a procedure. The Embeditor is the same Text Editor you’ve already used, but opened in a special mode which allows you to not only to edit all the embed points in your procedure, but to edit them within the context of template-generated code.

Notice that most of the code is on a gray background and the points where you can write your code have a white background. There are also identifying comments for each embed point. You can turn these comments on and off as you choose through the "Tools" -> "Options" dialog. Once you become familiar with them, you’ll probably want to turn them off, so you can see more of the actual code.
You’ll notice that a message briefly appeared that said, "Generating LCLesson." The Embeditor displays all possible embed points for the procedure within the context of all the possible code that may be generated for the procedure. Notice the distinction here: Embeditor does not show you the code that
will be generated, but all the code which
could be generated for you, if you chose every possible option and placed code into every available embed point. You are not likely to ever do that. Therefore, a lot more generated code shows up in the Embeditor than will actually be in the generated code when you compile your application. After we finish here, we’ll go look at the generated code to see the difference.
At the right end of the toolbar are four buttons which are essential to know when working in the Embeditor. These are (from left to right) the "Previous Embed", "Next Embed", "Previous Filled Embed", and "Next Filled Embed" buttons (hover your mouse over them and the tooltips appear naming the buttons). They allow you to quickly get from one embed point to another; particularly after you’ve written code into some of them.
One of the things we want this procedure to do is to detect changes to existing orders and make sure the changes do not result in a data mismatch between the "Order" and "Detail" tables. This system is storing the total dollar amount of an order in the "ORD:InvoiceAmount" column, so when the user changes a "Detail" item in an existing Order, we want to make sure the "Orders" table row is updated, too. There’s a fairly simple way to do that which will allow us to demonstrate the ABC Library’s flexible error handling.
Click on the "Next Embed" button (about 4 times) until you get to the embed point
immediately preceding the line of code reading
ThisWindow CLASS(WindowManager)
Each embed point potentially has 10,000 priority levels within it. This Embed code Priority level system is designed to allow you to embed your code before or after any generated code: whether that code is generated for you by
Clarion’s ABC Templates or any third-party templates you choose to use. This makes the embed system completely flexible, allowing you to add your own code at any logical point needed; before or after almost any "chunk" of generated code.
In the white area just above this line, type in (or copy and paste) the following:
LocalErrGroup GROUP
               USHORT(1)
               USHORT(99)
               BYTE(Level:Notify)
               PSTRING('Save the Order!')
               PSTRING('Some Item changed -- Press the OK button.')
              END
SaveTotal     LIKE(ORD:InvoiceAmount)
as shown in the image above.
The
red text indicates that the text begins in Column 1, and identifies a data label.
Clarion’s ABC (Application Builder Class) Templates generate Object Oriented code for you using the ABC Library. The ABC Library contains an error handling class called
ErrorClass. This bit of code declares a LocalErrGroup GROUP (in exactly the form that the ErrorClass requires: see the ABC Library Reference Vol I) containing a "custom" error number and message that we are defining for use by the ErrorClass object in our application. The "SaveTotal" declaration is a local variable which is defined LIKE (always has the same data type) the "ORD:InvoiceAmount" column. We’ll use this variable to hold the starting order total when the user is updating an existing order.
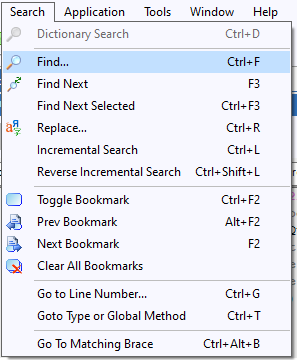
Choose "Search" -> "Find" to bring up the Find dialog, or press Ctrl-F.
The text we want to find is "ThisWindow.Init", so type it in to the "Find what" field and click the "Find" button. Click on the red "x" to close the Find dialog. You should see "ThisWindow.Init" highlighted on the screen.
Press the "Next Embed" button (about 6 times) until you get to the point just after
SELF.Errors &= GlobalErrors
as shown above. Paste in the following:
  SELF.Errors.AddErrors(LocalErrGroup)   !Add custom error
  IF SELF.Request = ChangeRecord         !If Changing a row
    SaveTotal = ORD:InvoiceAmount        !Save the original order total
  END
This code calls the "AddErrors" method of the "GlobalErrors" object to add the "LocalErrGroup" to the list of available errors that the object handles. The "GlobalErrors" object is an instance of the"ErrorClass" which the ABC Templates declare globally to handle all error conditions in the application. Adding our LocalErrGroup enables the GlobalErrors object to handle our "custom" error condition. This demonstrates the flexibility of
Clarion’s ABC Library. The
IF statement detects when the user is editing an existing order and saves the original order total.
This embed point is in the "ThisWindow.Init" procedure which performs some necessary initialization tasks. This is a virtual method of the "ThisWindow" object.
ThisWindow is the object which handles all the window and control handling code.
You may not have noticed, but the ABC Templates generate exactly one line of executable source code within the "UpdateOrder" procedure itself (GlobalResponse = ThisWindow.Run) so all the functionality of the "UpdateOrder" procedure actually occurs in object methods: either virtual methods specific to the "UpdateOrder" procedure itself or standard ABC Library methods. This is true of every ABC Template generated procedure. Generating fully Object-Oriented code makes the code generated for you very tight and efficient. Only the code that actually needs to be different for an individual procedure is handled differently. Everything else is standard code that exists in only one place and has been tested and debugged to ensure consistent performance.
Object-Oriented Programming (OOP) in
Clarion starts with the CLASS structure. See CLASS in the
Language Reference Help for a discussion of OOP syntax. The
Advanced Programming Resources PDF contains several articles which discuss OOP in depth, and the
ABC Library Reference fully documents
Clarion’s Application Builder Class (ABC) Library.
Press Ctrl-F to get back to the Find tool, and look for "ThisWindow.Kill". Click down two embed points and paste:
SELF.Errors.RemoveErrors(LocalErrGroup) !Remove custom error
This calls the ABC Library method to remove our "custom" error. The ThisWindow.Kill method is a "cleanup" procedure (performs necessary exit tasks) which executes when the user is finished working in the UpdateOrder procedure, so the error is no longer needed at that point.
Press Ctrl-F to get back to the Find tool, and look for "EVENT:CloseWindow". Click "Find"
twice to get to the desired one. Move down to the embed point and paste:
      IF SELF.Request = ChangeRecord AND |      ! If Changing a row
        SELF.Response <> RequestCompleted AND | ! and OK button not pressed
        SaveTotal <> ORD:InvoiceAmount          ! and detail recs changed
       GlobalErrors.Throw(99)                   ! Display custom error
       SELECT(?OK)                              ! then select the OK button
       CYCLE
      END
This is the code that will detect any attempt by the user to exit the UpdateOrder procedure without saving the Orders table row after they’ve changed an existing order. Note the
vertical bar characters (|) at the end of the first two lines of code. These are absolutely necessary. Vertical bar (|) is the
Clarion language
line continuation character. This means that the first three lines of this code are a single logical statement which evaluates three separate conditions and will only execute the GlobalErrors.Throw(99) statement and the next 2 lines if all three conditions are true. Click the green "Save and Close" button to
save your work.
Overriding the Edit in Place Classes
OK, now you’ve seen an example of how you can use the ABC Library in your own embedded source code. Now we’ll show you how to override a class to provide custom functionality that the ABC Library does not provide. The CLASS declarations for the objects that we named through the "Configure Edit in Place" dialogs are generated for you by the ABC Templates. These CLASSes are both derived from the
EditClass ABC Library class.
With "UpdateOrder" still selected, click on the "Embeds" button to display the Embeds Tree. Click on the "Contract All Nodes" button.
By pressing the "+" button on the tree, expand the "Local Objects", "Abc Objects", "EIP Field Manager for Browse Using ?List for column DET:Quantity (EditSpinClass)", "Init", "CODE", "Parent Call". Click on the "Source" button.
Go to the embed point immediately following the line of code reading
PARENT.Init(FieldNumber,Listbox,UseVar)
and paste in the following:
  SELF.Feq{PROP:Text} = ListBox{PROPLIST:Picture,FieldNumber}
                                   !Set entry picture token
  SELF.Feq{PROP:RangeLow} = 1      !Set RANGE values for the SPIN
  SELF.Feq{PROP:RangeHigh} = 9999
This code sets the data entry picture token and range of valid data for the SPIN control.
Scroll to the "EditInPlace::DET:Quantity.SetAlerts" method (this is about 8 clicks of the "Next Embed" button). In the CODE section just before the Parent Call, enter the following code:
  SELF.Feq{PROP:Alrt,5} = ''
  SELF.Feq{PROP:Alrt,6} = ''
Note: If you wish to see the base class code that we’ve overridden, open the "C:\Clarion11\LibSrc\win\ABEIP.CLW" file and search for "EditSpinClass".
Press Ctrl-F to open the find dialog and type in
EditInPlace::DET:ProdNumber.TakeEvent
in the "Find what" field. Click "Find". Close the dialog and click the "Next Embed" 3 times to get to the point below "ReturnValue = PARENT.TakeEvent(Event)". Paste in the following code:
  UPDATE(SELF.Feq)                              !Update Q field
  IF ReturnValue AND ReturnValue <> EditAction:Cancel OR |
       EVENT() = EVENT:Accepted                 !Check for completion
   PRO:ProdNumber = BrowseDET.Q.DET:ProdNumber  !Set for lookup
   IF Access:Product.Fetch(PRO:KeyProdNumber)   !Lookup Product row
     GlobalRequest = SelectRecord               !If no row, set for select
     BrowseProducts                             ! then call Lookup proc
     IF GlobalResponse <> RequestCompleted      !Row selected?
       CLEAR(PRO:Record)                        ! if not, clear the buffer
       ReturnValue = EditAction:None            ! and set the action to
     END                                        ! stay on same entry field
   END
   BrowseDET.Q.DET:ProdNumber = PRO:ProdNumber  !Assign Product table
   BrowseDET.Q.DET:ProdAmount = PRO:ProdAmount  ! values to Browse QUEUE
   BrowseDET.Q.PRO:ProdDesc   = PRO:ProdDesc    ! fields
   DISPLAY                                      ! and display them
  END
This is the really interesting code. Notice that the first executable statement (generated for you) is a call to the PARENT.TakeEvent method. This calls the EditSpinClass.TakeEvent method we’re overriding so it can do what it usually does.
All the rest of the code is there to give this derived class extra functionality not present in its parent class. This is the real power of OOP—if you want everything the parent does, plus a bit more, you don’t have to duplicate all the code the parent executes, you just call it. In this case, all the extra code is to perform some standard data entry validation tasks. This code will verify whether the user typed in a
valid Product Number and if they didn’t, it will call the ViewProducts procedure to allow them to choose from the list of products.
It also assigns the "ProdNumber", "ProdAmount" and "ProdDesc" in the local browse with the values from the chosen record in the "Product" table. This is how "ProdAmount" gets its correct price.
Overriding Methods in the Embeditor
There is a very important point to understand about working in the Embeditor or the Embed Tree. When you are overriding methods: as soon as you type
anything into an embed point in an overridable method, you have overridden it. Even a simple "!" comment line makes this happen, because the Application Generator notes that you have written
some of your own code, and so generates the proper method prototype into the local CLASS declaration for you. To prevent you from accidentally adding a comment that causes the method override which consequently "breaks" the functionality, the ABC Templates automatically generate PARENT method calls and RETURN statements for you, as appropriate.
You’ll notice that all of our overridden methods contained generated calls to their PARENT method, and the TakeEvent method also had a generated RETURN statement. Sometimes you want these statements to execute, and sometimes you don’t (usually, you do). For those cases where you do not want them to execute, simply write your code in the embed point which comes before the PARENT method call and write your own RETURN statement at the end of your code.
This means that the generated PARENT method call will never execute.
Clarion’s optimizing compiler is smart enough to recognize that these statements can never execute and optimizes them out of compiled object code. Click on the green "Save and Close" button to close the Embeditor, then press "Save and Exit" to close the embed tree. Click on the "Accept Changes" button to
save your work.
Update the Procedure Call Tree
The "EditInPlace::DET:ProdNumber.TakeEvent" method calls the "BrowseProducts" procedure from within its code. Since this is just embedded source code, the Application Generator doesn’t know you’ve called this procedure, and needs to be told (if you don’t, you’ll get compiler errors), so it can generate the correct MAP structure for the module containing this procedure.
Select "UpdateOrder" and click on the "Calls" button.
Highlight "BrowseProducts" then press the green "Save and Close" button.
Notice how the "BrowseProducts" procedure has been added to the "UpdateOrder" tree. Click on the "Accept Changes" button to
save your work.
Generate Code
Click on the "Generate the currently selected Application" button in the toolbar. Then right-click on "UpdateOrder" and choose "Module Source File" from the popup menu.
The
Text Editor appears, containing the generated source code for your UpdateOrder procedure. Notice that there is
a lot less code here than there was in the Embeditor. All that generated code in the Embeditor was there to provide you with
context, and to provide you with embed points with which to override methods, should you need to. However,
Clarion’s Application Generator and ABC Templates are smart enough to only generate the code you actually need, when you actually need it.
From the IDE Menu, choose "File" -> "Close" -> "File" to close the Text Editor. Now might be a good time to try out your application. You’ve got all the data entry portions completed and the only things lefts to do now are the reports, which we’ll get to in the next lesson.
Make a backup of your work.
OK, What Did I Just Do?
Here’s a quick recap of what you just accomplished:
- You created a new Form procedure.
- You created a "Scrolling-Form" metaphor Edit-in-place browsebox to update the Detail table.
- You created a total column to total up the order.
- You created a Formula to total each line item in the order.
- You used the Embeditor to write your embedded source code within the context of template-generated code.
- You used the power of OOP to extend the standard error handling functionality of the ABC Library.
- You used the power of OOP to derive and override the Edit-in-place classes to extend the standard functionality of the ABC Library.
- You generated source code to compare the difference between the code shown in the Embeditor to that which is actually generated.
We’re almost finished with this application. In the
next lesson, we’ll create the application’s reports.


No comments:
Post a Comment